Close

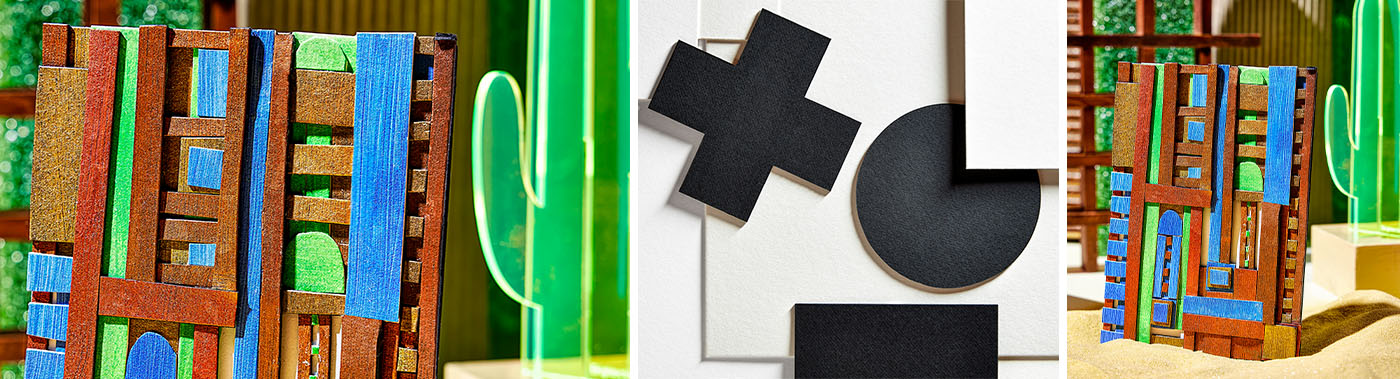
Abstract Line Assemblage
Lesson Plan, Grades 4-12, Art History, Crescent, 3-D, Collage, Mixed Media
Description
Lesson Plan and Artwork by Kathryn Cahill
Lines are important and foundational elements of art. Lines lead the eye around a composition and contribute to the implied meaning of an artwork. This lesson encourages students to experiment with line width, length, direction, depth and color to build assemblage artworks from strips of Crescent Board. Students can choose to use lines to express a feeling or emotion. Alternatively, students can create an abstraction of an existing visual object.
Objectives
- Research examples of vertical, horizontal and diagonal lines in historical artwork.
- Discuss how those lines contribute to the structure, feelings, meanings, and ideas in the art.
- Create thumbnail drawings using the element of line to convey a feeling, emotion or abstraction.
- Use the creative process to add color, cut and assemble their boards using a variety of mixed-media, construction and collage techniques.
- Display, present, critique and analyze how their line assemblages function as meaningful works of art.
Supplies Needed
Crescent® 3 Pack Multi Purpose Drawing Boards, 16 x 20 Inches
Crescent® 3 Pack Premium Illustration Boards, 16 x 20 Inches
Crescent® 3 Pack Double Sided Ultra Black Boards, 16 x 20 Inches
Sax® True Flow® Heavy Body Acrylic Paint, Neon Assorted Colors, 2 Ounces, Set of 6
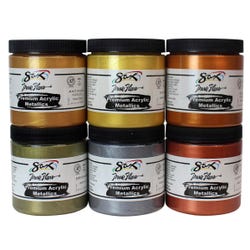
Sax® Premium Heavy-Bodied Acrylic Metallics, 8 Ounce Jars, Set of 6
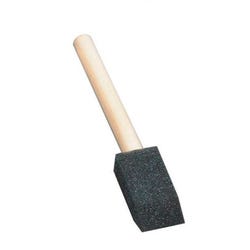
School Smart® Wedge Foam Wood Handle Paint Brushes, 1 Inch, Pack of 10
Aleene’s® Tacky Glue®, 0.66 Ounces, Pack of 18
Catalyst Silicone Wedge No 1
Westcott® CarboTitanium Scissors with Adjustable Glide 8 Inches Bent Handle
Standards
Standard #1: Generate and conceptualize artistic ideas and work.
Standard #3: Define and complete artistic work.
Standard #6: Convey meaning through the presentation of artistic work.
Instructions
1
Introduce the basic element of art – “line” to students including its definition, function and the different types of lines. Illustrate how vertical, horizontal and diagonal lines move and direct the point of focus. Show how lines can be long, short, thick and thin. Explain the concept of repetition and balance using lines. Discuss how color can contribute to the conceptual meaning of a line.
2
Look closely at the function of lines in several works of historical art. View lines in various art styles like Constructivist graphic art and assemblage, Cubism, Futurism, De Stigl, Abstract Expressionism, Modernism, Bauhaus Architecture and Art Deco.
3
Describe how each artist or movement used different types of lines and discuss how the line qualities contributed to the feeling, meaning or idea in each work. This specific project was inspired by Frank Lloyd Wright’s window designs like Saguaro Forms and the lines were progressively abstracted, creating multiple finished versions. For this project, only vertical and horizontal lines were used to simplify preparation and construction processes.
4
Students choose a meaningful feeling, emotion or historical artwork to inspire their independent work. Students draw and color thumbnail explorations of their subject using the variable elements of line in multiple ways. Students choose an expressive color palette that helps to communicate their idea.
5
Crescent Boards including Drawing Boards, Illustration Boards and Textured Black Boards can be lightly coated with Sax Premium Heavy-Bodied Acrylic Paints using scrapers or squeegees like silicone wedges. Foam brushes can also be used for thin applications of paint, but they should be washed quickly after using. For this Frank Lloyd Wright window inspired abstraction, the metallic acrylics were used on the textured black boards, and the neon acrylics were mixed with silver and used to lightly coat the surface of the drawing and illustration boards. The project could also include Crescent Boards prepared with pencil, colored pencil, pastel and/or ink for more possibilities and variations.
6
When dry, cut the painted Crescent Board into standard sized strips on a guillotine trimmer, maintaining consistent widths between 1 and 3 inches. Strips smaller than a 1-inch width could curve and warp. One layer of this board is thin enough for simple cuts with sturdy scissors, but it is dense enough to prohibit more intricate and curved lines like zig zags and scalloped edges.
7
Students lay out their strips over a background of Crescent Board to visualize the line placements in their compositions. The background board could be cut into a simple shape like an arrow or lightning bolt before attaching strips then trimming them flush. Scissors cannot easily cut through the thickness of double or combined layers. Cut to shape or trim each single layer of board before gluing an additional layer on top.
8
Individually trim each strip to length and glue onto the background using tacky glue. Spread the glue evenly all the way to the edges of each strip using a wedge or foam brush. If the edges are not covered in glue, the board may warp upwards at each end. A weighted object like a thick book can help level the artwork while the glue is drying.
9
Continue to trim, glue and assemble the strips of Crescent Board until the abstract assemblage artwork is complete.
10
Title the artwork with a clue to the meaning, feeling or inspiration.
11
Display the artwork. Present and discuss how the element of line communicates feeling, emotion, idea or meaning.